I’ve been MIA for a bit, but I’m here now! And I finally have a completed entry closet to share. Our entry closet served its purpose, but it was missing some style and efficiency. It basically needed an overhaul. And let me tell you, this felt like the longest small project ever! It didn’t help the timeline when I discovered that my stain for the door had solidified, or that winter kept coming back for twenty last hurrahs. But it’s finally done and I’m excited to share it with you! Let’s remember what it used to look like…

And that picture was on a good day! Imagine more coats, scarves, etc crammed in there and you’ll have a better picture of how it typically looked (at least it was behind a closed door!).
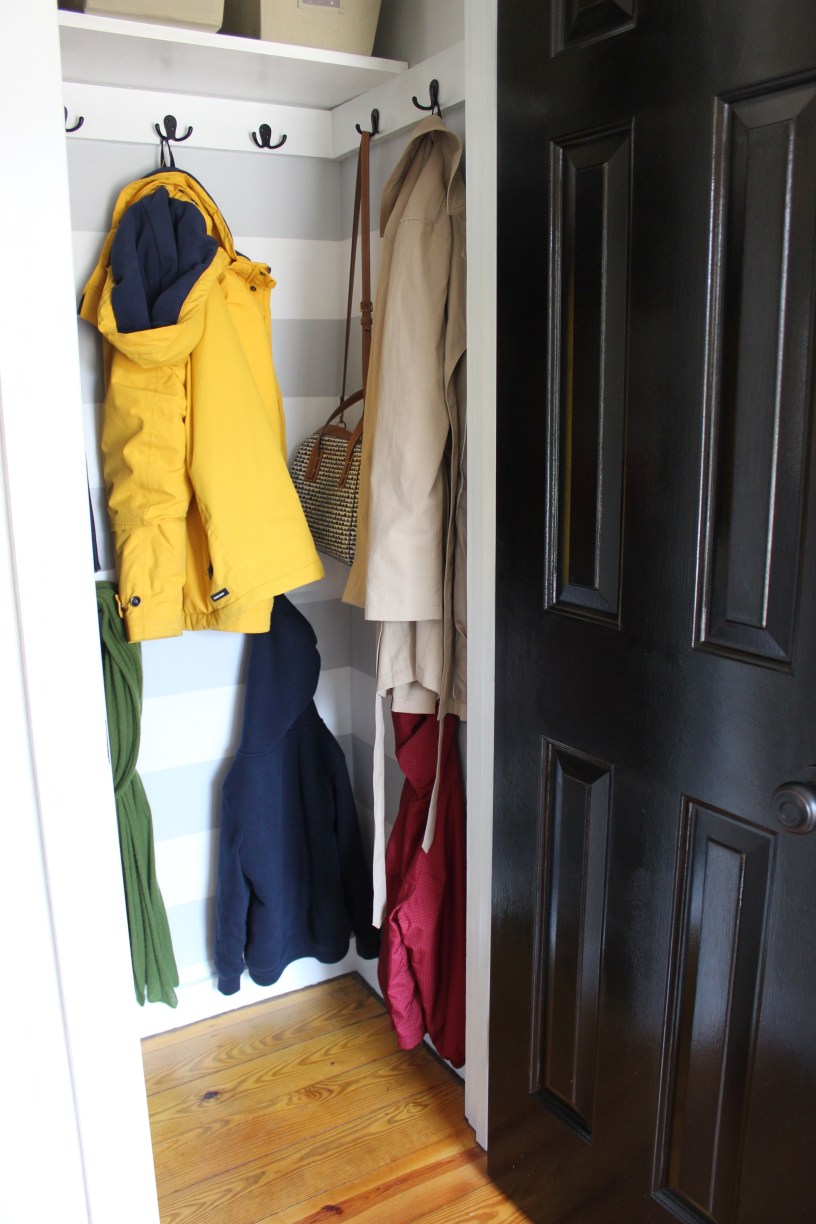
Let’s get this party started! I removed every last item from the closet and gave it a good wipe down before I pulled out the primer. I always use a primer before paint because it ensures a nice, even surface for your paint to adhere to (my go-to primer is Kilz Premium…it’s no VOC and low odor, it’s a decent price and it’s readily available at your good ‘ole Home Depot). After priming, I painted the walls in Behr’s Ultra Pure White eggshell finish, and the trim work in the semi-gloss finish. I had originally considered using wallpaper, but I couldn’t find the perfect one at the perfect price. The husband suggested painting wide stripes and I’m so happy we went with that plan because I LOVE stripes (I won’t tell you how many striped pieces of clothing I own, but it borders on ridiculous).
Planning the stripes was pretty easy. I knew I wanted an odd number of stripes (better looking aesthetically), so I took my measurements between the space where my two rows of hooks were going to go. I lucked out…30 inches to make five 6-inch wide stripes, x2 sections. I used my trusty level to measure the stripes, taped them off, and painted the edges of my tape with the white paint. Why paint the edges white, you ask? It’s a cool trick to ensure that you get crisp lines before you paint with another color…it makes a seal so you’re less likely to have any drips. The grey color we chose is called Loft Space (also by Behr). This is the color my son chose for his room and since I didn’t need much paint for the stripes, it was a win for all of us.


I opted for hooks instead of a hanging bar, mainly to make it easier for everyone to hang their stuff (and because I still wanted to see those cool stripes). The hooks are super simple…black, double-pronged from Home Depot. I put 8 hooks in each section, so there’s 32 places to hang a coat, a dog leash, a library bag, etc.! So far, everybody in the house is using the hooks (except the dog…he makes us do everything for him).


The door staining process took longer than I wanted because I had to wait for decent weather, since my only place to stain a door is outside. It was about a 3-day process. I grabbed my trusty sanding block to lightly sand my hinges and door. For the hinges, I used Rust-Oleum semi-gloss protective enamel in a bronze color (it’s what I used on my kitchen cabinet hinges and it’s held up well. Plus, it beats buying all new hinges!). The stain for the door is Minwax Polyshades in Espresso Satin. It took about 2 coats of stain to get the deep color I wanted, plus some minor touch-ups in some spots. Let me know if you’d like to see a detailed post of the staining process (I have about nine more doors in the house to do, so there will be plenty of opportunities to break down the process).


So, there we have it! A tiny closet redo that took too long to complete. But it’s done and I’m super happy with it!


That turned out great!
LikeLike